How to Create Outlook Rules for Selective E-mail Notification
Oct 8, 2009
You probably know you should turn off Outlook’s e-mail notifications to limit interruptions, but you have probably resisted because you are afraid of missing some important mail. Well here is an approach that will definitely make this practical.
Some background: I am a big fan of turning off e-mail notifications in Outlook, particularly the blue notification rectangle that announces new mail in Outlook versions 2003 and later (officially called the Desktop Alert in Outlook).
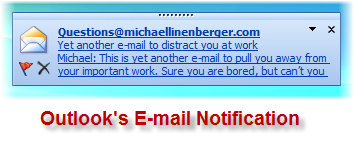
The trouble with that box is it displays just enough of the message to suck you in completely, thus truly doing a great job of wrenching your attention away from higher priority work. Research shows it can take up to five minutes for a worker to completely refocus on a task after an interruption. So as these things pop up every 5 or 10 minutes, or even more often, guess what—your productivity is getting hosed (even if you do not stop and open the mail item).
The solution of course is to turn that notification off; but many worry they will miss an important e-mail if they do that. There is a relatively easy solution in using Outlook Rules, but the particular way to apply it “depends.” There are two general cases.
The first case is if you have a relatively well-defined set of people you “care” about looking for mail from. If that is the case, you can create a rule to only show the blue notification rectangle when you get mail from those people. Note you can add as many people as you want to that list and you can even indicate distribution lists.
The second case is if you have a relatively cohesive workgroup and you can agree as a team to do something novel: everyone will use the High Importance setting on mail that is urgent (and not on non-urgent mail). That’s using that small red exclamation point icon you can easily set on outgoing mail (see below).
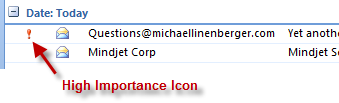
As a team you can then configure all your copies of Outlook to show the blue notification rectangle only for such High Importance mail. If you use this second approach, I suspect you will want to use the first approach as well—but for listing VIPs outside your workgroup that you want notifications from; you can easily do that too.
Once you do this, you may start to experience an unusual level of focus again while doing your work.
How to Configure This in Outlook
This is relatively easy to set up. In the steps below I show Outlook 2007 screenshots, but the approach works in Outlook 2003 as well.
Step 1 is to turn off automatic notifications for all mail. Do that by following these instructions.
Once that is complete, you will now configure manual notifications as follows, for the two cases we discussed.
Configure Rule Case 1 (distinct people or distribution list)
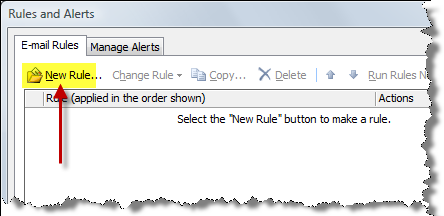
1) Go to the Outlook menu bar. Choose Tools, and then Rules and Alerts… Then, in the Rules and Alerts dialog, click on the New Rule... button as shown below.
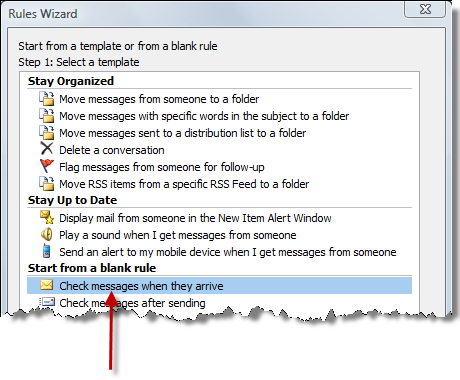
2a) Outlook 2003 users, in the Rules Wizard dialog box, click the button Start From a Blank Rule
2b) All users, in the Rules Wizard dialog box (as shown below for Outlook 2007), click Check Messages When They Arrive and click the Next> button.
3) Then, you will see the following dialog box. In that box, first, select the top item called From People or Distribution List. And then in the same dialog box, click the People or Disribution List link at the bottom. See figure below.
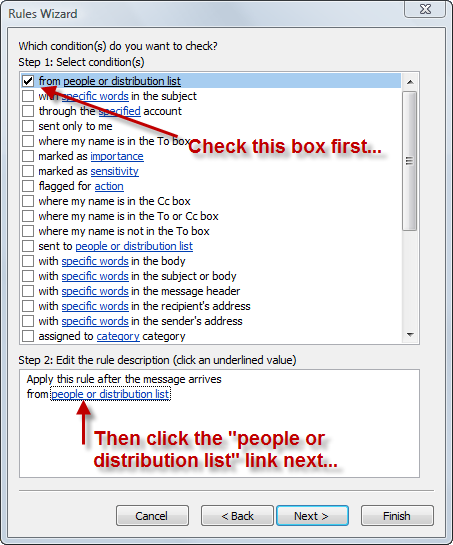
4) You will then see a standard Outlook address dialog box open. Select the people you want (or distribution list), make sure they are listed at the bottom of that dialog box, then click OK. Note they are then added to the Rules Wizard dialog box at the bottom.
5) Now click the Next> button on that window.
6) You will now see the following dialog box. Scroll to the bottom and select Display a Desktop Alert.
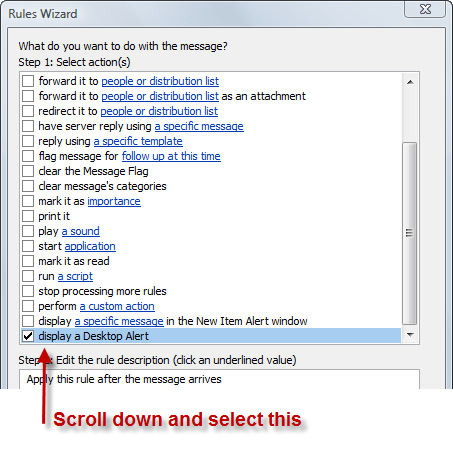
7) Then click the Next> button.
You will most likely skip the next dialog box that has to do with exceptions (though in some cases you may use this; study it to see if anything there helps you). Click Next>.
8) You will see a place to name your rule next to the field called Step 1: so insert a name that makes sense to you, as shown below. Leave the Turn on This Rule box selected.
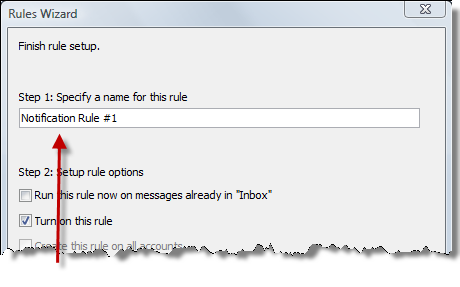
9) Finally, click the Finish button. And in the next window (the main Rules and Alerts window, not shown here) be sure to click the OK button (or the new rule will not be saved).
Configure Rule Case 2 (High Importance)
In this example I will assume you want a separate rule. But note you could combine this rule into the same one above if you wish; I leave that to you for futher study. Assuming a separate rule...
1) Go to the Outlook menu bar. Choose Tools, and then Rules and Alerts… Then, in the Rules and Alerts dialog, click on the New Rule... button as shown below.
2a) Outlook 2003 users, in the Rules Wizard dialog box, click the button Start From a Blank Rule
2b) All users, in the Rules Wizard dialog box (as shown below for Outlook 2007), click Check Messages When They Arrive and click the Next> button.
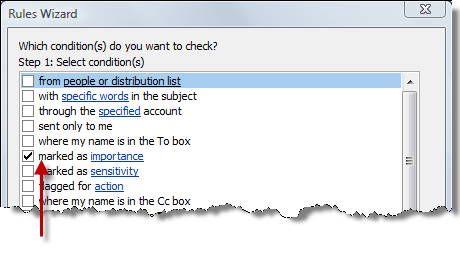
3) Then, you will see the following dialog box. In that box, first, select the item named Marked as Importance as shown below;.
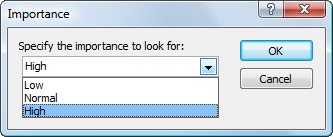
4) At the bottom of that window, click the Importance link. You will see the following dialog box open; select High. Then click OK
Now follow the steps above in Case #1, starting with step 5.
That should do it. Ask someone to send you an e-mail message that will trigger one of these rules, and confirm they work.