
Microsoft Exchange includes an elaborate, mostly behind the scenes, facility to automatically delete old mail. It’s got a ton of rather complicated features mostly set by your Exchange Administrator if they choose to use them. But there are some optional and underused “personal” features that might be available for you.
If they are available to you, these personal retention settings can greatly help you clear your Inbox and help you keep your Inbox or folders free of old mail that you don’t need.
I’ve created 4 new video lessons about this in the Outlook Inbox Ninja Video Course, and the first one is free for all. It’s Lesson 1.11. So go to that link now and watch Lesson 1.11. But if you’d rather read about this instead, read on below.
Example of Where Personal Retention Policies Make Sense to Use
Here’s a good example, I get a lot of daily and weekly news-oriented emails. I like to let some of them stay around in my Inbox or Archive folder (often categorized as READ LATER—see Inbox Ninja Lesson 1.6) for about a week or so, just in case I have time to read them.
But after about a week they are old news and useless. So these days, when I first get them, I apply a retention policy to auto-delete them in a week. This helps keep my folders clear and means there is less mail I must delete manually. Doing all this is easy using Exchange retention policies. It’s especially easy if you combine them with Outlook rules or Quick Steps—it takes just a few seconds to set up first, and then it’s automatic after that.
I can’t tell you how useful this is for automatically clearing out old mail!
Let me go into a bit more detail on how this works. And again, if you want to go to the Outlook Inbox Ninja video set, I’ve just added a brand-new video lesson to that Ninja set (Lesson 1.11) that shows visually what I present in words below, and it’s free for all to watch.
I’ve also added three more new lessons to the paid set that expand on this and they are mentioned below.
Check to See if You Can Do this
Here is the first step to using these retention policies. You should first check in your Windows desktop Outlook to see if the personal retention policy features are active for you. To check that:
- Make sure your menu Ribbon is fully open at the top of your Inbox;
- Then activate the Home tab;
- Find the Tags group on the Ribbon (near the middle right of the Ribbon). You might have to widen your Outlook window to see it fully;
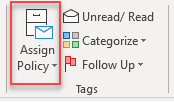
- In that Tags group, look for the Assign Policy button, like I show below.
If you can see the Assign Policy button, great! You are part way there. If you cannot see it, well, you’ll have to talk with your Exchange Admin staff and ask them to activate it for you. If you have your own Office 365 subscription with Exchange, and you administer your own Exchange account, I’ve added a video to the Ninja course that may help you add that button, it’s Lesson 8.3.
Inside the Assign Policy Button
Assuming you have that Assign Policy button active, next we need to check what’s inside. Default Exchange retention policies usually display the choices shown in the following figure. The ones we need for this purpose are the Delete policies.

Your list might have more or less to choose from than shown here, but if you’ve got the Delete policies I show above, then you are all set. If you are missing the Delete policies, or you want to add some more choices, say a 3-day or 1-day delete, both of which are useful, the new Inbox Ninja video lesson number 8.3 shows you how to do that.
How to Use Delete Policies
These policies do what they say. Once you apply them to mail, the mail will auto delete after the time-period expires. Note that the time period is measured from the Received date of the mail, not from the day you applied the policy, so keep that in mind.
How do you apply them? Well, one way is to select one or more emails, and then use that Apply Policy button and menu to manually apply such policies to the selected email.
But you will almost never do that!
Don’t worry, you didn’t waste your time finding or activating that Assign Policy button, because it IS the first step—it is required to go to the next step.
But using that button is way too much work. Rather, the idea is to have policies applied automatically to certain types of mail. To do that, you will use either Quick Steps or Outlook Rules with features that become active once that button is active.
Using Quick Steps with Retention Policies
In prior videos in the Outlook Inbox Ninja set, I show you how to use Quick Steps to quickly process mail (Lesson 1.8). And I show you how to apply a READ LATER category to incoming low-priority mail you possibly want to read later, but that you want to dismiss for now (Lesson 1.6).
Well, I’ve just added a brand-new video lesson to that Ninja set (Lesson 1.12) that shows how to combine all these together. It shows how to create a Quick Step command that both assigns a READ LATER category AND applies a Delete-after-1-week policy to the email. AND it optionally files the mail into your single folder where you can read it before it is deleted. So, if you own that course, go watch that new lesson 1.12, it’s really good.
But that’s only one way to do it. With certain mail it makes sense for you to use an Outlook rule instead.
Create a Rule to Set the Retention Policy
For certain mail, instead of using a Quick Step, you should create one or more Outlook rules to set some delete retention policies on incoming mail, based on sender name or text in the subject line. This is possible because, once the Assign Policy button discussed above is active, then another Outlook rule choice is added to the “Select Actions” page in the advanced Rules Wizard. Down at the very bottom you will see the choice highlighted in the figure below. This choice will only be there if the Assign Policy button I described above is visible—they are linked.

Next Steps for Rules
It is beyond the scope of this short article to teach you how to create Outlook rules. My Outlook Inbox Ninja video course teaches you how, and I’ve just added another video lesson there specifically for setting these retention rules—see the brand-new Lesson 2.10 Using Retention Rules. It walks you through all the points for this.
But if you do know how to create Outlook rules, the tips above should be enough to get you going on this incredibly valuable use of Exchange retention policies. In no time you’ll be having much of your low-priority mail get auto-removed after a week, or a month, or whatever time is appropriate for the given sender or subject. So, use these tools, and enjoy your more-empty Inbox!
Michael
Hi Michael
Great article about retention policies, thank you.
I have a customer who wants to have a special retention policy configuration.
The user has to manually tag (with retention policy) all mails he wants to keep for 10 years.
A second, default policy deletes all mails older than 365 days.
A third, default policy moves all mails older than 366 days to the archive.
The problem is that it is not easy to see in the inbox which mail has already been tagged (assigned a retention policy). The user only sees this when he opens the mail.
Do you know of a possibility, e.g. an add-in, that can display mails with a retention policy assigned – in color?
Marc, unfortunately, no, don’t know of a way to do that. But something might be out there. Michael
Will the mail get deleted from the recipient’s inbox too?
Hi Michael,
Is there a way of setting up an retention policy which deletes all emails in an inbox but leaves the subfolders? Or would it simply delete all items in the inbox which are older than 6 months.
Kind regards,
Myles